Kubernetes Cluster Setup
Before we can explore GitOps, we need a Kubernetes cluster to work with. While cloud providers offer managed Kubernetes services, they cost money and add unnecessary complexity when learning. Instead, we’ll use minikube - a tool that runs a complete Kubernetes cluster on your laptop, completely free.
By the end of this tutorial, you’ll have:
- A working local Kubernetes cluster
- All necessary tools installed and configured
- A test application running to verify everything works
- GitHub repository ready
- ArgoCD installed and ready to deploy
This foundation enables you to learn production-grade GitOps patterns without infrastructure costs or complexity. Everything you learn here applies directly to production Kubernetes clusters.
Step 1: Choose Your minikube Driver
minikube needs a way to create virtual machines or containers to run Kubernetes. You have several options:
A driver is the technology minikube uses to create the environment where Kubernetes runs. Think of it as the foundation:
- Container-based (Docker, Podman) - Runs Kubernetes in a container
- VM-based (VirtualBox, Hyper-V, KVM) - Runs Kubernetes in a virtual machine
Tip
For this series, we recommend Docker. It’s the most common setup and has the best community support. All examples will use Docker, but everything works with other drivers too. More documentation about minikube drivers can be found here.
Step 2: Install kubectl
kubectl is the command-line tool for interacting with Kubernetes clusters. You’ll use it constantly, regardless of which driver you choose.
Tip
In this series, we will use Homebrew to install kubectl, but feel free to use the method that you prefer. More documentation about kubectl installation can be found here.
# Using Homebrew (recommended)
brew install kubectl

# Verify installation
kubectl version --client
Expected output:
Client Version: v1.32.x
Kustomize Version: v5.5.x
Tip
The kubectl version doesn’t need to exactly match your cluster version. kubectl supports clusters within one minor version (older or newer).
Step 3: Install Your Driver
Tip
In this series, we will use Docker, but feel free to use the driver that you prefer. More documentation about minikube drivers can be found here.
Check if you already have Docker:
docker --version
If that works, skip to Step 4! Otherwise, install Docker:
For Windows, and MacOS, you can install Docker from the Docker website.
For Linux, you can install the Docker Engine using the recommended methods for your distribution.
Step 4: Install minikube
To install minikube, you can use the recommended methods for your distribution.
# Verify installation
minikube version
Expected output:
minikube version: v1.37.x
commit: xxxxxxxxxxxxx
Step 5: Start Your First Kubernetes Cluster
Now for the exciting part - starting your cluster!
Start minikube (With Docker)
# Start cluster with Docker driver
minikube start --driver=docker --cpus=2 --memory=4096

# This will take 2-5 minutes on first run
# minikube downloads the Kubernetes components
Start minikube (With Other Drivers)
# Start cluster with VirtualBox driver
minikube start --driver=virtualbox --cpus=2 --memory=4096

# Hyper-V (Windows)
minikube start --driver=hyperv --cpus=2 --memory=4096

# KVM (Linux)
minikube start --driver=kvm2 --cpus=2 --memory=4096

# Let minikube choose automatically
minikube start --cpus=2 --memory=4096
Expected output:
😄  minikube v1.37.0 on Darwin 15.6.1 (arm64)
✨  Using the docker driver based on user configuration
📌  Using Docker Desktop driver with root privileges
👍  Starting "minikube" primary control-plane node in "minikube" cluster
🚜  Pulling base image v0.0.48 ...
💾  Downloading Kubernetes v1.34.0 preload ...
    > preloaded-images-k8s-v18-v1...:  332.38 MiB / 332.38 MiB  100.00% 73.20 M
    > gcr.io/k8s-minikube/kicbase...:  450.06 MiB / 450.06 MiB  100.00% 48.43 M
🔥  Creating docker container (CPUs=2, Memory=4096MB) ...
🐳  Preparing Kubernetes v1.34.0 on Docker 28.4.0 ...
🔗  Configuring bridge CNI (Container Networking Interface) ...
🔎  Verifying Kubernetes components...
    ▪ Using image gcr.io/k8s-minikube/storage-provisioner:v5
🌟  Enabled addons: default-storageclass, storage-provisioner
🏄  Done! kubectl is now configured to use "minikube" cluster and "default" namespace by default
Tip
If you have more resources available, you can increase CPUs and memory: minikube start --cpus=4 --memory=8192
Note
The first start takes longer because minikube downloads the Kubernetes container images. Subsequent starts are much faster.
Verify Cluster Health
# Check cluster status
minikube status
Expected output:
minikube
type: Control Plane
host: Running
kubelet: Running
apiserver: Running
kubeconfig: Configured
# Check kubectl connection
kubectl cluster-info
Expected output:
Kubernetes control plane is running at https://127.0.0.1:60737
CoreDNS is running at https://127.0.0.1:60737/api/v1/namespaces/kube-system/services/kube-dns:dns/proxy
# View cluster nodes
kubectl get nodes
Expected output:
NAME       STATUS   ROLES           AGE   VERSION
minikube   Ready    control-plane   3m    v1.34.0
Access Kubernetes Dashboard
minikube includes a web-based dashboard for visualizing your cluster:
# Start the dashboard (opens in browser)
minikube dashboard
This opens a browser window showing:
- Cluster resource usage
- Running workloads
- Deployments, pods, services
- Logs and events
Tip
Keep the dashboard open in a browser tab - it’s helpful for visualizing what’s happening as you learn GitOps.
Step 6: Deploy a Test Application
Let’s verify everything works by deploying a simple application.
Create a Test Deployment
# Deploy nginx web server
kubectl create deployment nginx --image=nginx:latest

# Verify deployment created
kubectl get deployments
Expected output:
NAME    READY   UP-TO-DATE   AVAILABLE   AGE
nginx   1/1     1            1           10s
# Check the pod
kubectl get pods
Expected output:
NAME                     READY   STATUS    RESTARTS   AGE
nginx-xxxxxxxxxx-xxxxx   1/1     Running   0          20s
Expose the Application
# Create a service to access nginx
kubectl expose deployment nginx --type=NodePort --port=80

# Get the service URL
minikube service nginx --url
Expected output:
http://127.0.0.1:xxxxx
Open that URL in your browser - you should see the “Welcome to nginx!” page.
View Application Logs
# Get logs from the nginx pod
kubectl logs deployment/nginx

# Follow logs in real-time
kubectl logs deployment/nginx -f
Expected output:
/docker-entrypoint.sh: /docker-entrypoint.d/ is not empty, will attempt to perform configuration
/docker-entrypoint.sh: Looking for shell scripts in /docker-entrypoint.d/
/docker-entrypoint.sh: Launching /docker-entrypoint.d/10-listen-on-ipv6-by-default.sh
10-listen-on-ipv6-by-default.sh: info: Getting the checksum of /etc/nginx/conf.d/default.conf
10-listen-on-ipv6-by-default.sh: info: Enabled listen on IPv6 in /etc/nginx/conf.d/default.conf
/docker-entrypoint.sh: Sourcing /docker-entrypoint.d/15-local-resolvers.envsh
/docker-entrypoint.sh: Launching /docker-entrypoint.d/20-envsubst-on-templates.sh
/docker-entrypoint.sh: Launching /docker-entrypoint.d/30-tune-worker-processes.sh
/docker-entrypoint.sh: Configuration complete; ready for start up
2025/10/06 23:41:09 [notice] 1#1: using the "epoll" event method
2025/10/06 23:41:09 [notice] 1#1: nginx/1.29.1
2025/10/06 23:41:09 [notice] 1#1: built by gcc 12.2.0 (Debian 12.2.0-14+deb12u1)
2025/10/06 23:41:09 [notice] 1#1: OS: Linux 6.10.14-linuxkit
2025/10/06 23:41:09 [notice] 1#1: getrlimit(RLIMIT_NOFILE): 1048576:1048576
2025/10/06 23:41:09 [notice] 1#1: start worker processes
2025/10/06 23:41:09 [notice] 1#1: start worker process 29
...
Clean Up Test Resources
# Delete the test deployment and service
kubectl delete deployment nginx
kubectl delete service nginx

# Verify cleanup
kubectl get deployments,services
Tip
In the future, we won’t use kubectl create or kubectl delete commands. Everything will be managed through Git and ArgoCD!
Step 7: Enable Ingress Controller
An ingress controller manages external access to services in your cluster, typically HTTP/HTTPS. minikube includes an NGINX ingress controller addon that we’ll use to access ArgoCD via a URL instead of port-forwarding.
# Enable the ingress addon
minikube addons enable ingress

# Wait for the ingress controller to be ready (takes 30-60 seconds)
kubectl wait --namespace ingress-nginx \
  --for=condition=ready pod \
  --selector=app.kubernetes.io/component=controller \
  --timeout=120s
Expected output:
💡  ingress is an addon maintained by Kubernetes. For any concerns contact minikube on GitHub.
You can view the list of minikube maintainers at: https://github.com/kubernetes/minikube/blob/master/OWNERS
💡  After the addon is enabled, please run "minikube tunnel" and your ingress resources would be available at "127.0.0.1"
    ▪ Using image registry.k8s.io/ingress-nginx/controller:v1.13.2
    ▪ Using image registry.k8s.io/ingress-nginx/kube-webhook-certgen:v1.6.2
    ▪ Using image registry.k8s.io/ingress-nginx/kube-webhook-certgen:v1.6.2
🔎  Verifying ingress addon...
🌟  The 'ingress' addon is enabled
pod/ingress-nginx-controller-xxxxxxxxxx-xxxxx condition met
Verify Ingress Controller
# Check the ingress controller pod
kubectl get pods -n ingress-nginx
Expected output:
NAME                                        READY   STATUS      RESTARTS   AGE
ingress-nginx-admission-create-xxxxx        0/1     Completed   0          60s
ingress-nginx-admission-patch-xxxxx         0/1     Completed   0          60s
ingress-nginx-controller-xxxxxxxxxx-xxxxx   1/1     Running     0          60s
Note
The ingress controller is now ready to route external traffic to services in your cluster. We’ll use this for ArgoCD in the next section.
Note
After the addon is enabled, please run minikube tunnel and your ingress resources would be available at 127.0.0.1.
For more information about using ingress with minikube, see the Kubernetes documentation.
ArgoCD Installation & First Deployment
Now that we have a working Kubernetes cluster, let’s install ArgoCD and experience GitOps in action.
Info
If you haven’t read the series introduction, start there to understand the GitOps principles we’re implementing. This section focuses on the practical setup.
Step 1: Install ArgoCD
ArgoCD is a GitOps operator that continuously monitors Git repositories and keeps your cluster in sync.
Install ArgoCD in Your Cluster
For more information about ArgoCD, you can check the official documentation and the Getting Started Guide.
# Create namespace for ArgoCD
kubectl create namespace argocd

# Install ArgoCD
kubectl apply -n argocd -f https://raw.githubusercontent.com/argoproj/argo-cd/stable/manifests/install.yaml

# This installs all ArgoCD components
# Wait for pods to be ready (takes 1-2 minutes)
kubectl wait --for=condition=ready pod -l app.kubernetes.io/name=argocd-server -n argocd --timeout=300s
Expected output:
namespace/argocd created
...
customresourcedefinition.apiextensions.k8s.io/applications.argoproj.io created
customresourcedefinition.apiextensions.k8s.io/applicationsets.argoproj.io created
customresourcedefinition.apiextensions.k8s.io/appprojects.argoproj.io created
serviceaccount/argocd-application-controller created
serviceaccount/argocd-applicationset-controller created
serviceaccount/argocd-dex-server created
serviceaccount/argocd-notifications-controller created
serviceaccount/argocd-redis created
serviceaccount/argocd-repo-server created
serviceaccount/argocd-server created
...
pod/argocd-server-xxxxxxxxxx-xxxxx condition met
Verify ArgoCD Installation
# Check all ArgoCD pods are running
kubectl get pods -n argocd
Expected output:
NAME                                                READY   STATUS    RESTARTS   AGE
argocd-application-controller-0                     1/1     Running   0          2m
argocd-applicationset-controller-xxxxxxxxxx-xxxxx   1/1     Running   0          2m
argocd-dex-server-xxxxxxxxxx-xxxxx                  1/1     Running   0          2m
argocd-notifications-controller-xxxxxxxxxx-xxxxx    1/1     Running   0          2m
argocd-redis-xxxxxxxxxx-xxxxx                       1/1     Running   0          2m
argocd-repo-server-xxxxxxxxxx-xxxxx                 1/1     Running   0          2m
argocd-server-xxxxxxxxxx-xxxxx                      1/1     Running   0          2m
Note
All pods should show 1/1 under READY and Running under STATUS. If any show 0/1 or Pending, wait another minute and check again.
(Optional) Install ArgoCD CLI
Tip
We will use Homebrew to install ArgoCD CLI, but feel free to use the method that you prefer. More documentation about ArgoCD CLI installation can be found here.
# Install ArgoCD CLI
brew install argocd
Step 2: Access ArgoCD UI
ArgoCD has a web interface for managing deployments. You can access it either via port-forwarding or using an ingress (recommended).
Get Initial Admin Password
Using the CLI
# Retrieve the auto-generated admin password
argocd admin initial-password -n argocd
Using kubectl
# Retrieve the auto-generated admin password
kubectl -n argocd get secret argocd-initial-admin-secret -o jsonpath="{.data.password}" | base64 -d && echo
Expected output:
a3B9mK7sL2nP8qR4t # Your password will be different
Tip
Save this password - you’ll need it in a moment. The username is admin.
Access ArgoCD UI
Option A: Access via Ingress (Recommended)
Using ingress provides a cleaner URL-based access pattern similar to production environments.
# Create an ingress resource for ArgoCD
kubectl apply -f - <<EOF
apiVersion: networking.k8s.io/v1
kind: Ingress
metadata:
  name: argocd-server-ingress
  namespace: argocd
  annotations:
    nginx.ingress.kubernetes.io/force-ssl-redirect: "true"
    nginx.ingress.kubernetes.io/ssl-passthrough: "true"
    nginx.ingress.kubernetes.io/backend-protocol: "HTTPS"
spec:
  ingressClassName: nginx
  rules:
  - host: argocd.local
    http:
      paths:
      - path: /
        pathType: Prefix
        backend:
          service:
            name: argocd-server
            port:
              name: https
EOF
Expected output:
ingress.networking.k8s.io/argocd-server-ingress created
Verify the ingress is created:
kubectl get ingress -n argocd
Expected output:
NAME                    CLASS   HOSTS           ADDRESS        PORTS   AGE
argocd-server-ingress   nginx   argocd.local    172.17.0.15    80      30s
Note
It may take a minute or two for the ADDRESS to be assigned. If you see <pending>, wait a moment and check again.
Configure access based on your operating system:
Tip
The method differs depending on your OS and driver. Choose the appropriate approach below.
For Linux or macOS/Windows with VM-based drivers (VirtualBox, Hyper-V, KVM):
# Get minikube IP
minikube ip

# Add to /etc/hosts (replace <MINIKUBE_IP> with the output from above)
echo "<MINIKUBE_IP> argocd.local" | sudo tee -a /etc/hosts
For macOS or Windows with Docker driver:
The Docker driver on macOS/Windows has network limitations that prevent direct access to the minikube IP. You need to use minikube tunnel instead.
# In a separate terminal, start the minikube tunnel
# This must stay running - don't close this terminal
minikube tunnel
Expected output:
✅  Tunnel successfully started

📌  NOTE: Please do not close this terminal as this process must stay alive for the tunnel to be accessible ...

🏃  Starting tunnel for service argocd-server-ingress.
Note
The tunnel requires sudo/administrator privileges. You may be prompted for your password.
# In a different terminal, add to /etc/hosts
echo "127.0.0.1 argocd.local" | sudo tee -a /etc/hosts
Tip
On Windows, edit C:\Windows\System32\drivers\etc\hosts as Administrator. On macOS/Linux, edit /etc/hosts with sudo.
Now open your browser and navigate to: https://argocd.local
Note
You’ll see a security warning because ArgoCD uses a self-signed certificate. Click “Advanced” → “Proceed to argocd.local” (the exact steps vary by browser).
Option B: Access via Port-Forward
If you prefer not to modify your hosts file, you can use port-forwarding instead.
# Port forward to access ArgoCD UI
kubectl port-forward svc/argocd-server -n argocd 8080:443
Expected output:
Forwarding from 127.0.0.1:8080 -> 8080
Forwarding from [::1]:8080 -> 8080
Info
Keep this terminal window open. Port forwarding stops when you close it.
Open your browser and navigate to: https://localhost:8080
Note
You’ll see a security warning because ArgoCD uses a self-signed certificate. Click “Advanced” → “Proceed to localhost” (the exact steps vary by browser).
Login to ArgoCD UI
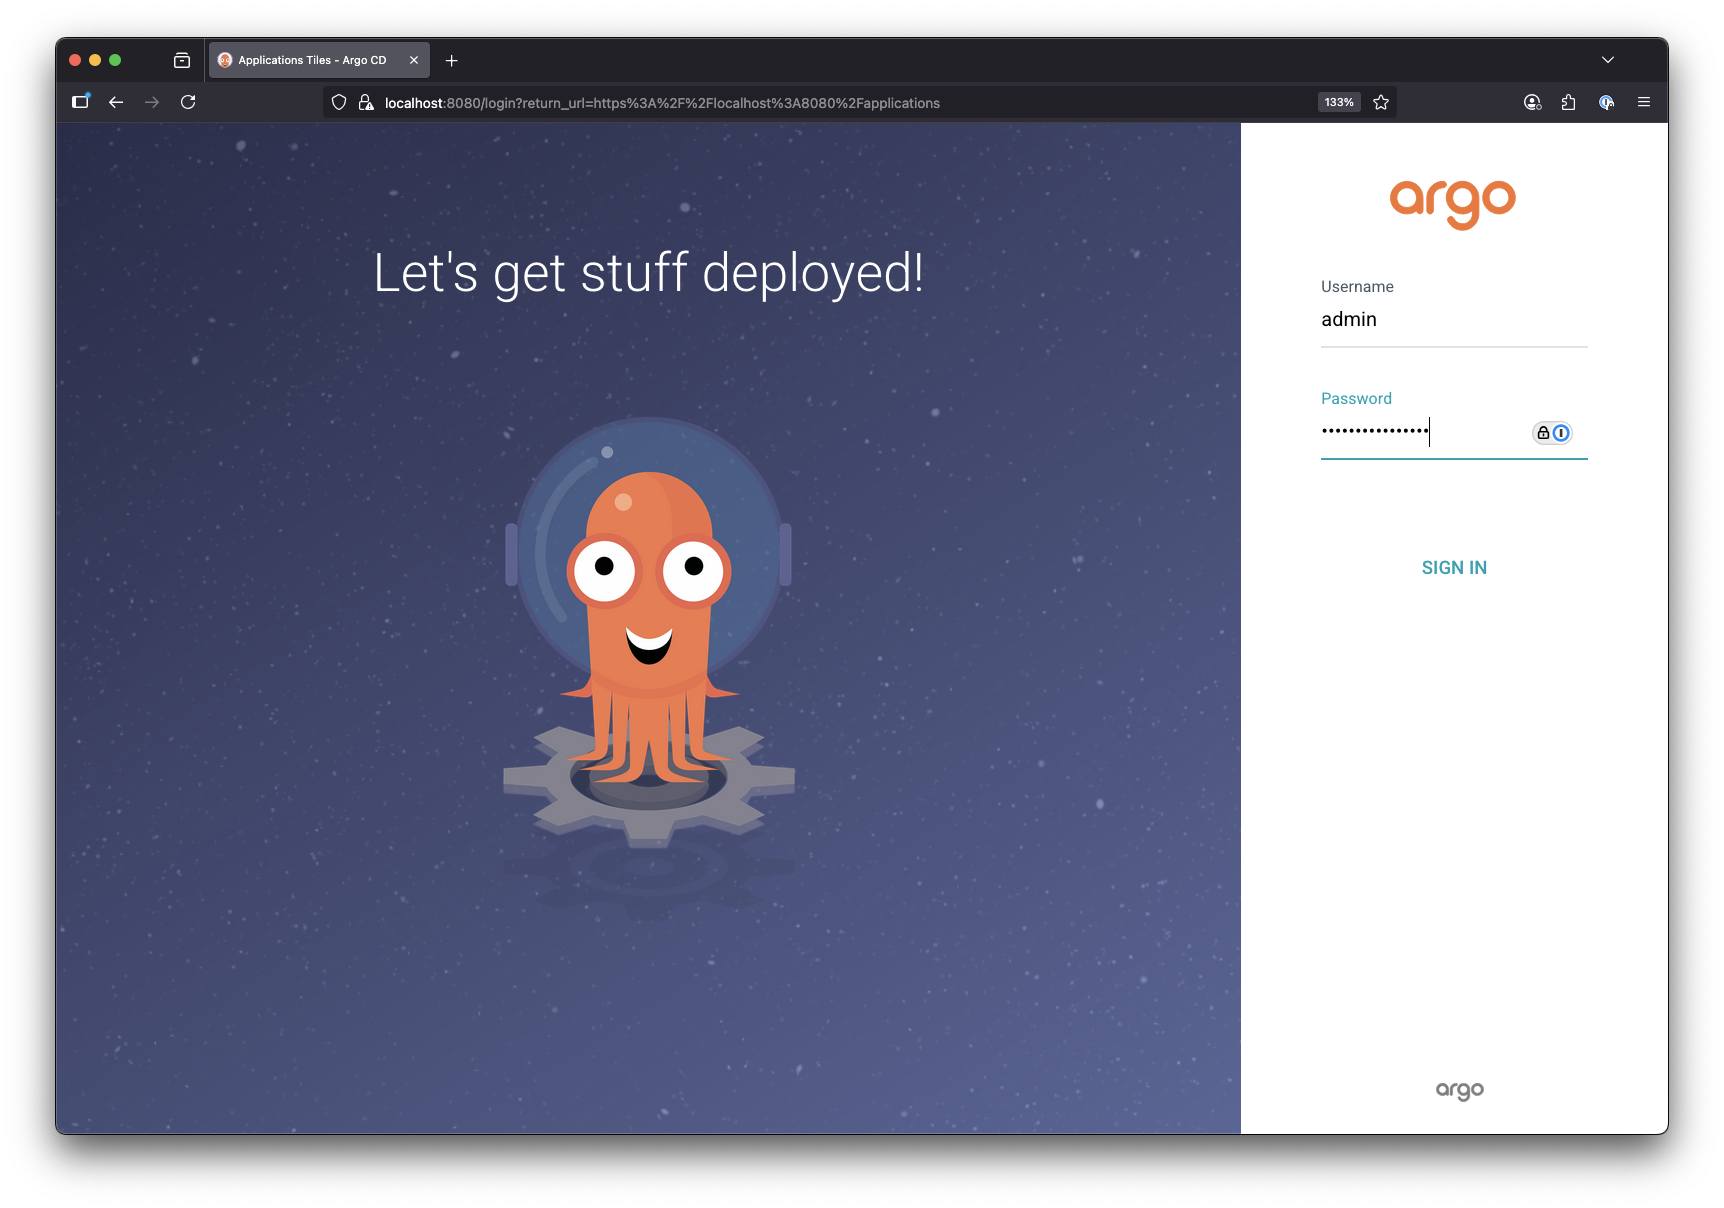
Login credentials:
- Username:
admin - Password: (the value from the “Get Initial Admin Password” step)
You should see the ArgoCD dashboard - currently empty because we haven’t deployed any applications yet.

(Optional) Access ArgoCD UI using CLI
# Access ArgoCD UI using CLI (if using ingress)
argocd login --insecure --username admin argocd.local

# Or if using port-forward
argocd login --insecure --username admin localhost:8080
Expected output:
Password: **********
'admin:login' logged in successfully
Context 'localhost:8080' updated
(Optional) Update ArgoCD Password
Using the CLI
# Update ArgoCD password
argocd account update-password
Expected output:
*** Enter password of currently logged in user (admin):
*** Enter new password for user admin:
*** Confirm new password for user admin:
Password updated
Context 'argocd.local' updated
Using The UI
Step 3: Deploy Your First GitOps Application
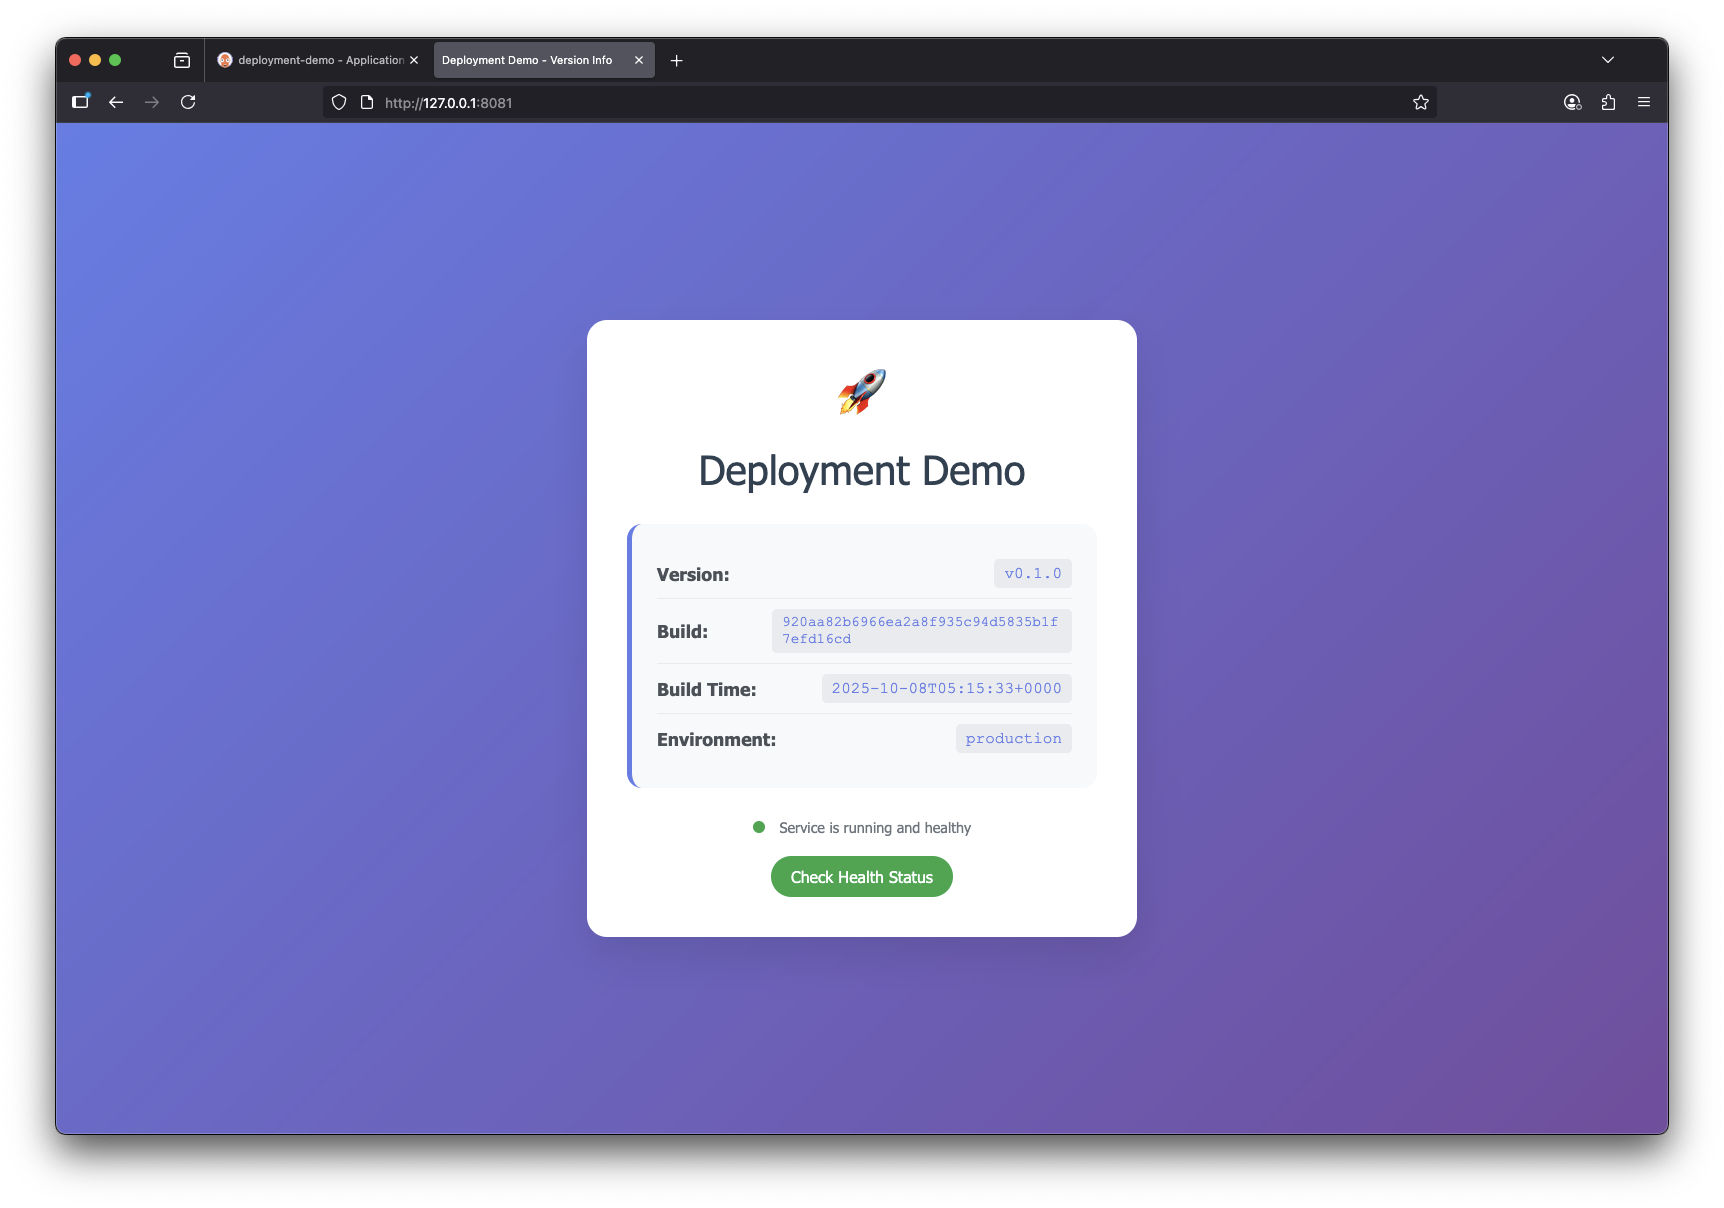
For this demo, we will be using two repositories:
- Deployment Demo - A Golang application providing a simple UI with version info
- Deployment Demo Config - A repository containing the Kubernetes configuration
This separation follows GitOps best practices: application code in one repo, Kubernetes manifests in another.
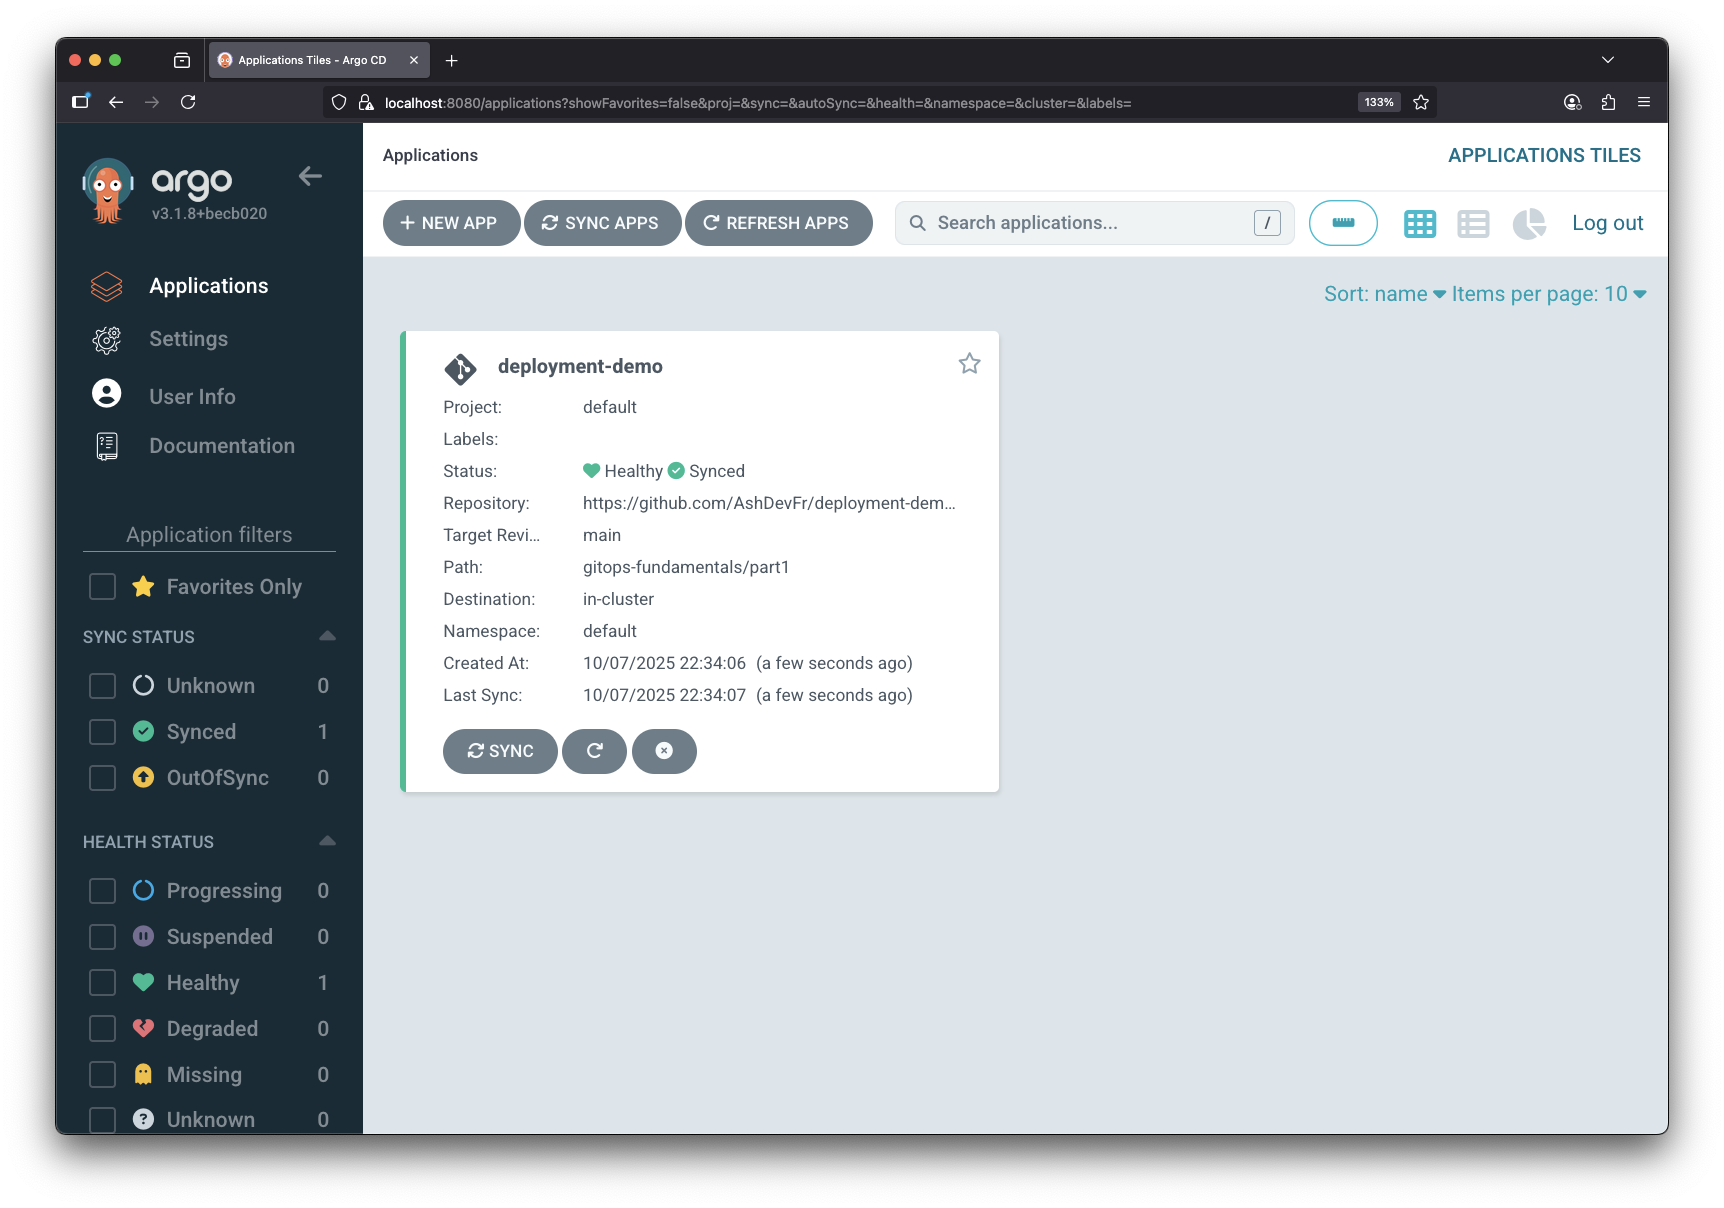
Create an ArgoCD Application
# Create ArgoCD application resource
kubectl apply -f - <<EOF
apiVersion: argoproj.io/v1alpha1
kind: Application
metadata:
  name: deployment-demo
  namespace: argocd
spec:
  project: default
  source:
    repoURL: https://github.com/AshDevFr/deployment-demo-config.git
    targetRevision: main
    path: gitops-fundamentals/part1
  destination:
    server: https://kubernetes.default.svc
    namespace: default
  syncPolicy:
    automated:
      prune: true
      selfHeal: true
    syncOptions:
    - CreateNamespace=true
EOF
Expected output:
application.argoproj.io/deployment-demo created
Now in the ArgoCD UI, you should see the deployment-demo application.

Verify Deployment
# Get the deployment
kubectl get deployment deployment-demo
Expected output:
NAME              READY   UP-TO-DATE   AVAILABLE   AGE
deployment-demo   1/1     1            1           10s
Using port forwarding, you can also access the deployment-demo application:
# Port forward to access deployment-demo application using kubectl
kubectl port-forward svc/deployment-demo 8081:8080

# Or using minikube
minikube service deployment-demo --url
Step 4: Experience GitOps Self-Healing
This is where GitOps shines. Let’s delete the deployment and watch ArgoCD automatically recreate it - demonstrating the automated reconciliation we discussed in the series introduction.
Delete the Deployment Manually
# Delete the deployment
kubectl delete deployment deployment-demo

# Check immediately - it's gone
kubectl get deployments
Expected output:
deployment.apps "deployment-demo" deleted from default namespace
No resources found in default namespace.
Watch ArgoCD Recreate It
# Wait 5-10 seconds, then check again
kubectl get deployments
Expected output:
NAME              READY   UP-TO-DATE   AVAILABLE   AGE
deployment-demo   1/1     1            1           10s
What Just Happened?
This demonstrates GitOps self-healing in action:
- You deleted the deployment using
kubectl delete - ArgoCD detected drift - the cluster state (no deployment) didn’t match Git (deployment should exist)
- ArgoCD automatically reconciled - it recreated the deployment to match what’s defined in Git
- Git remained the source of truth - your manual change was overridden
This is the power of GitOps: Git always wins. The cluster continuously converges to match what’s in Git.
Tip
Watch this in the ArgoCD UI:
- The “Last Sync” timestamp updates when ArgoCD detects drift
- The application’s event log shows the sync event
- The resource tree briefly shows the deployment as missing, then recreated
Key Insight: In traditional deployments, kubectl delete would permanently remove your application. With GitOps, it’s just temporary - ArgoCD will restore it automatically because Git declares it should exist.
This is exactly the declarative configuration and automated reconciliation we explained in the series introduction. You’ve now seen it work in practice!
What’s Next
In Part 2, we’ll explore:
- Multi-environment management (dev, staging, production)
- Kustomize for environment-specific configurations
- Promotion workflows between environments
Your local GitOps foundation is ready. See you in Part 2!
Resources
Series Navigation: